
Last weekend I upgraded the control panel on my HotTop. I originally purchased the KN-8828P model HotTop because it was their latest model and frankly, I had never roasted before so I had no practical knowledge of roasters. And while the HotTop is a great roaster, the “P” model doesn’t allow for much manual control over the roast in real time — it’s designed for programing the profile ahead of time and letting the machine rule the roast.
See also: HotTop Resources
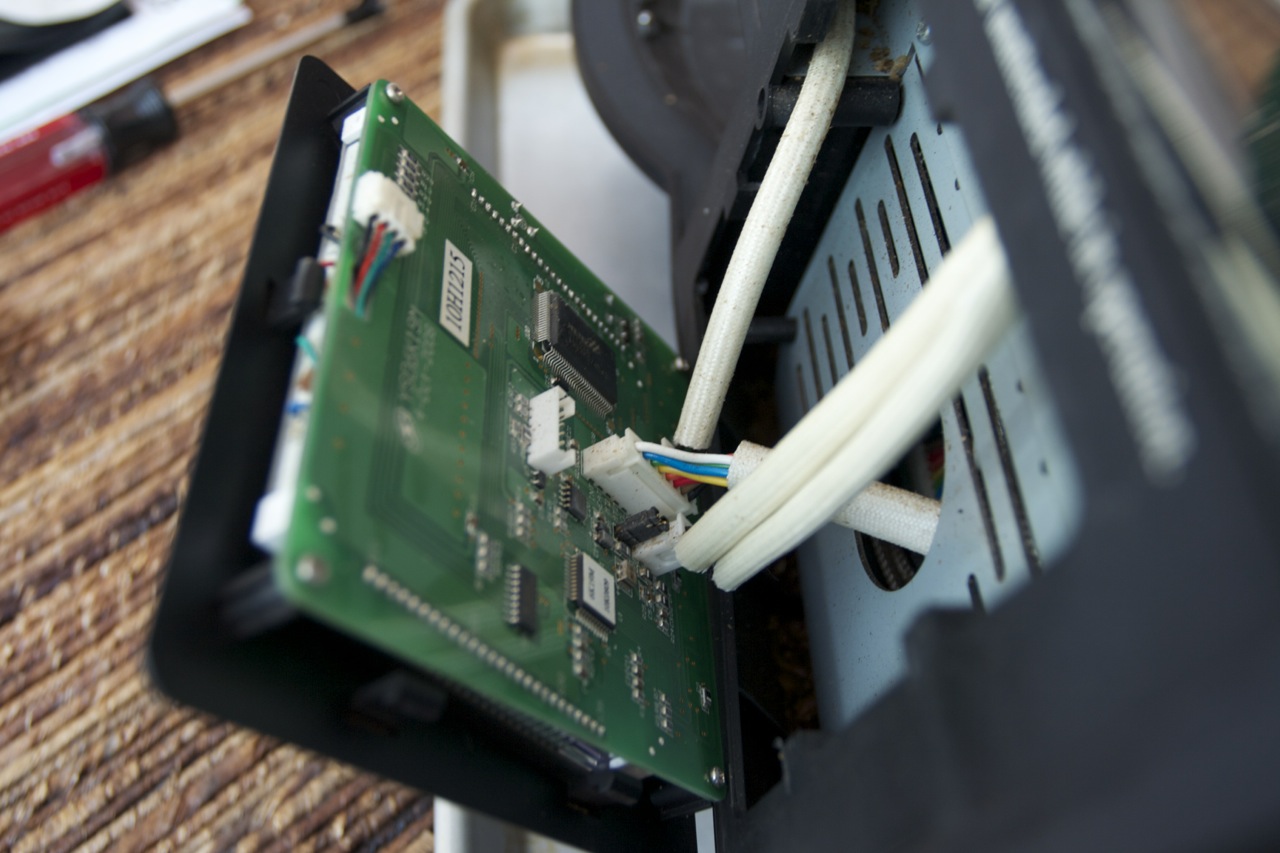
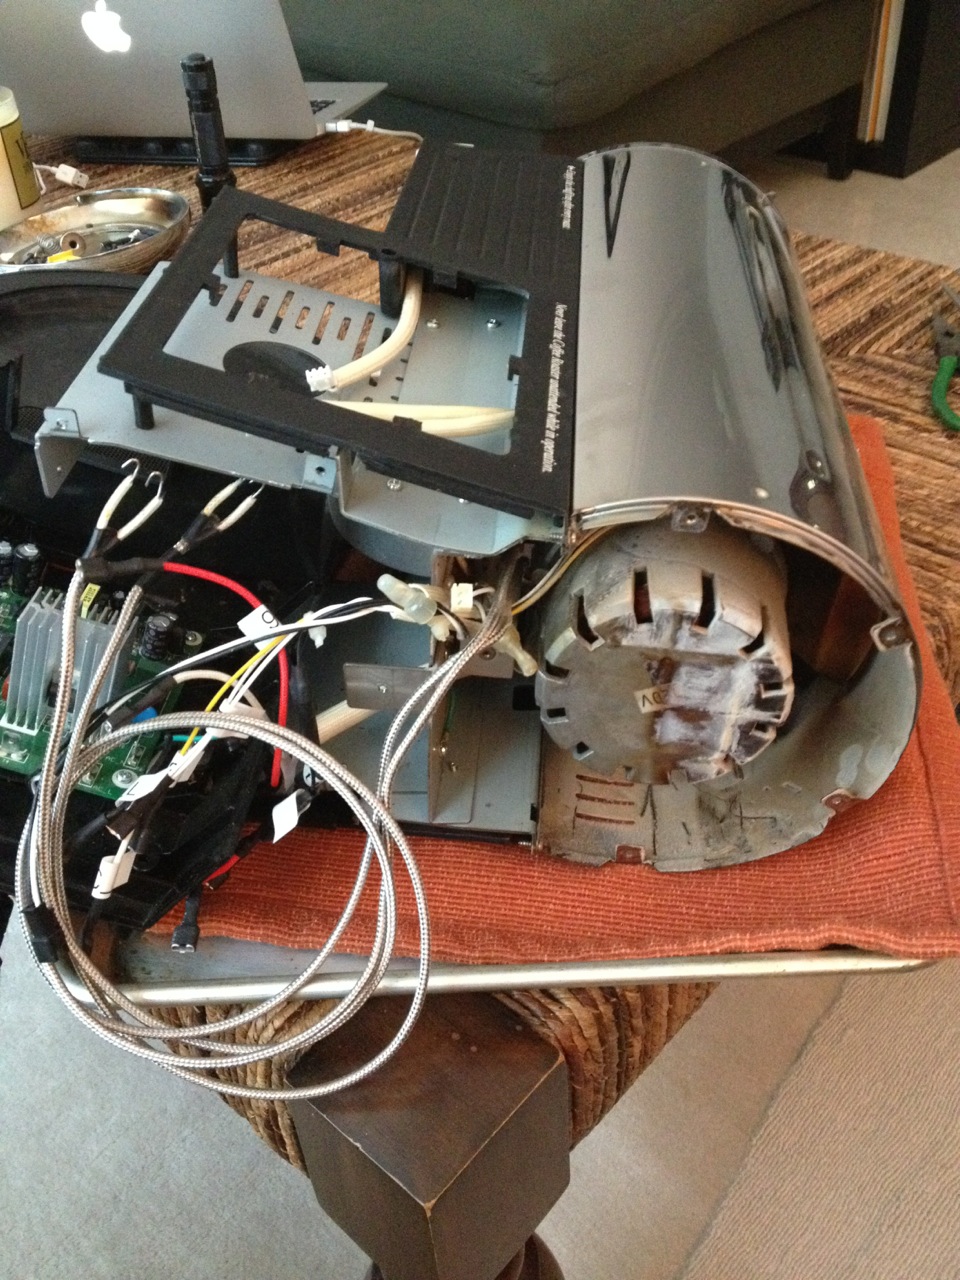
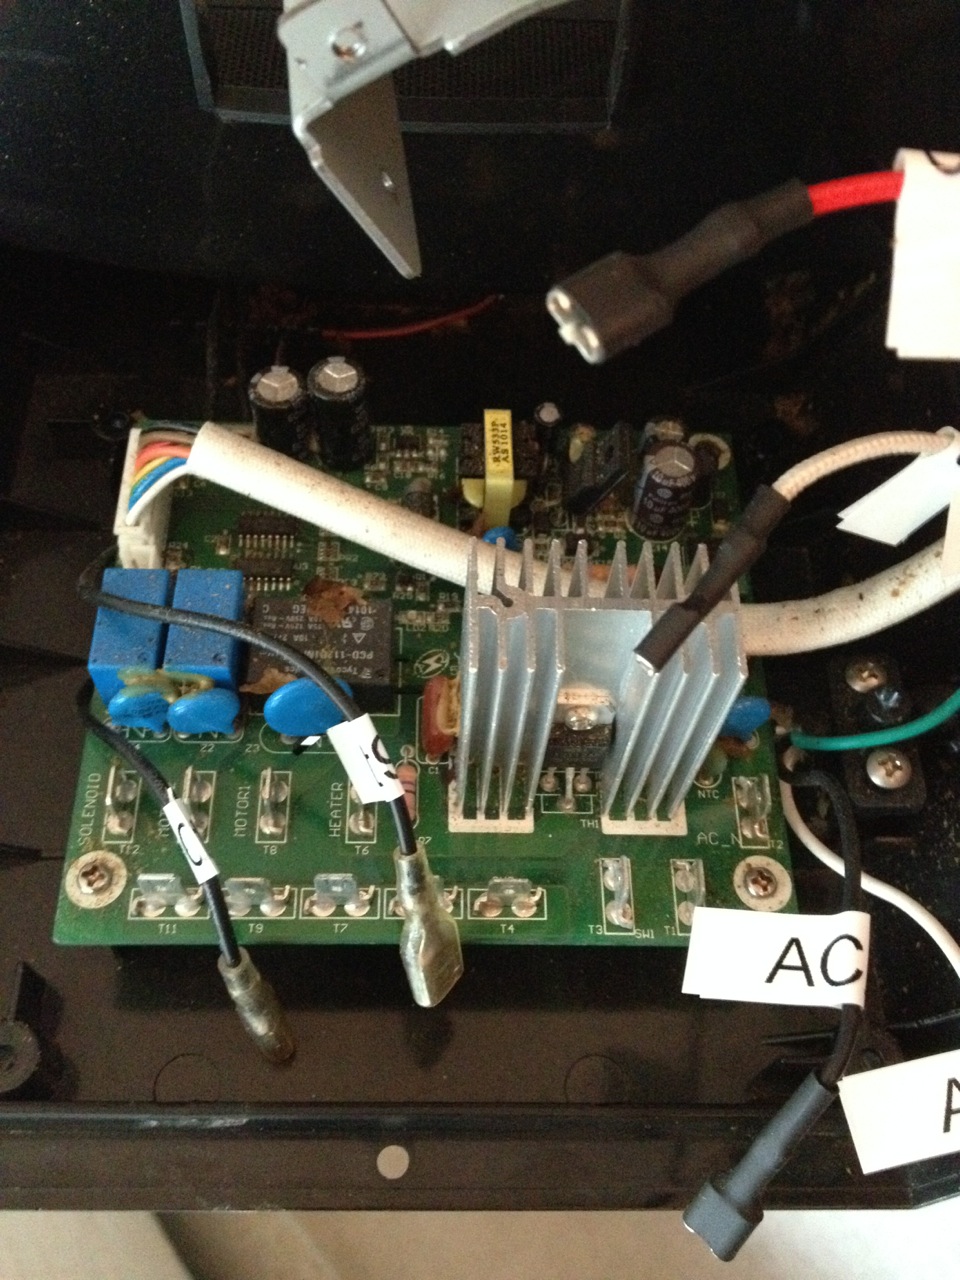
Now that I know more about roasting, I want control and the “B” panel gives me that plus the ability to use pre-programmed profiles. The upgrade is very straight-forward; you simply remove the “P” panel and replace it with the “B” panel. All the other electronic guts are the same between the models. Unfortunately, I didn’t pick up on that fact and I bought an upgrade kit that came with a main board, control panel, and chaff door switch. Only after I gutted my roaster and compared the two main boards did I realize my mistake. But no worries, it was an opportunity to thoroughly clean the inside of the roaster and I’m now more intimate with the workings of my roaster.
Now that I have full control over the roast, I’m much happier in my ability to react to the roast and produce better coffees.

That’s actually all that needs to be messed with to upgrade from the “P” to the “B” models. But I unnecessarily took it a step or three further:
Below is a picture of the first two profiles run with the “B” panel. The first profile is the lighter, background curve. I was trying to mimic the profile I used on my Diedrich. In that profile, I increase airflow to 50% at 300°F and drop heat by 20% at 325°F. When I did that with the HotTop in the first profile (the background curve in the image below) I stalled the roast. It seams that 50% air and 80% heat isn’t enough juice with a 150g bean load.
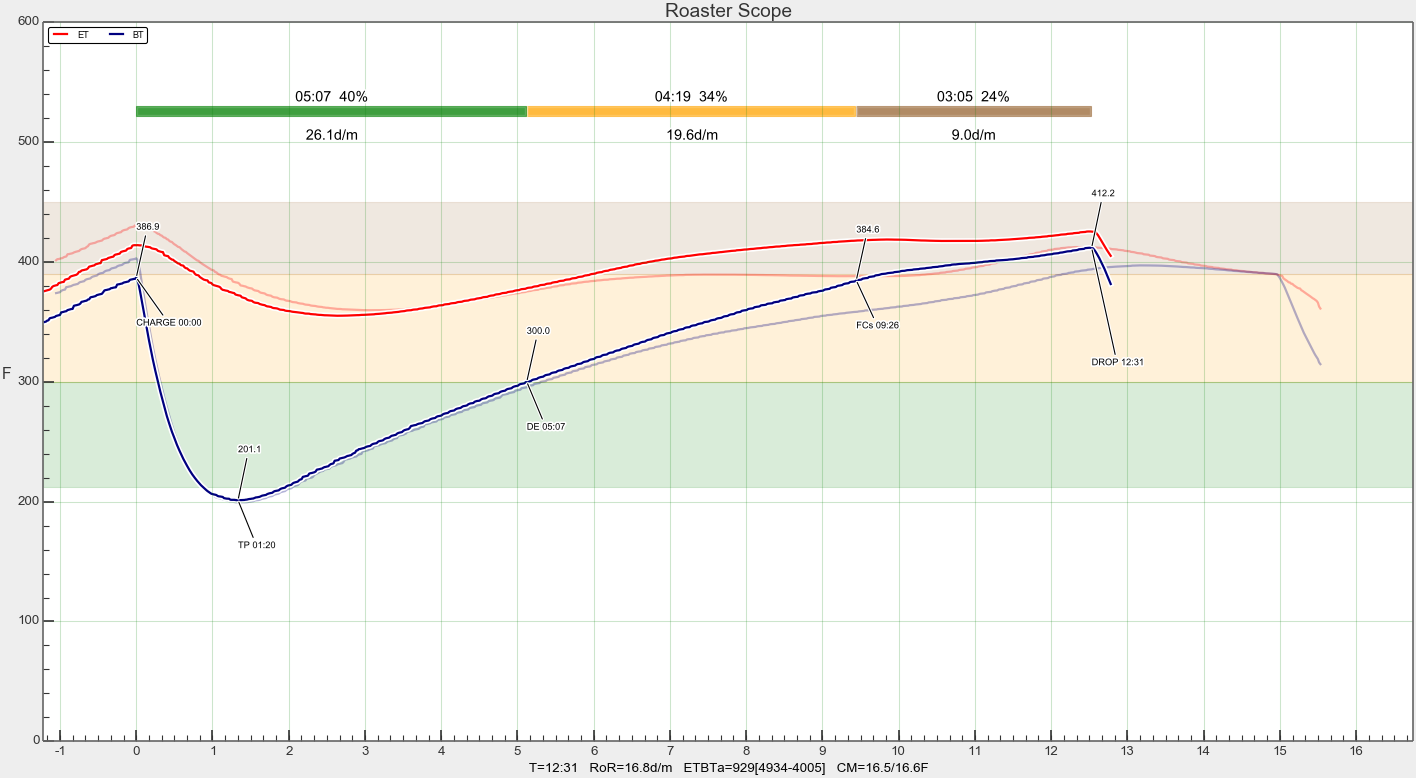
With the new-found control, I was able to compensate, albeit too late, to recover from the stall. You can see at the 10 minute mark, the ET reaches a turning point and resumes an increase. I baked the beans and ended with a much longer-than-usual total roast time.
The second profile was much closer to what I was trying to achieve, which is Scott Rao’s recommended profile.
Value 4 Value
If you found this content useful, please consider supporting my work. I charge no set fee or price for providing this. You can help keep information like this openly accessible by matching the value you received in the content; value 4 value.Ko-fi / Bitcoin Wallet: 32SW9kcAsJdZvQKBazhLUZBSD9YS8DDqe8