
While this post details the specifics on how to clean the exhaust fan of a HotTop roaster, the same principle applies to any roaster that circulates air through the drum chamber.
See also: HotTop Resources
Byproducts of the roasting process present in the smoke — namely tars such as creosote — collect on the fan as the smoke is ventilated from the drum. As this build-up gets thicker, it reduces the airflow of your roaster, which affects the roasting process. Therefore a structured cleaning regime should include regularly cleaning the exhaust fan.
Equipment list
- Small, soft-bristle brush
- Small scrub brush
- Compressed air
- Puro Caff cleaner (great for removing coffee solids and oil build-up on any coffee gear)
- Philips-head screwdriver
- two pairs of needle-nose pliers
Step 1: Disassembly
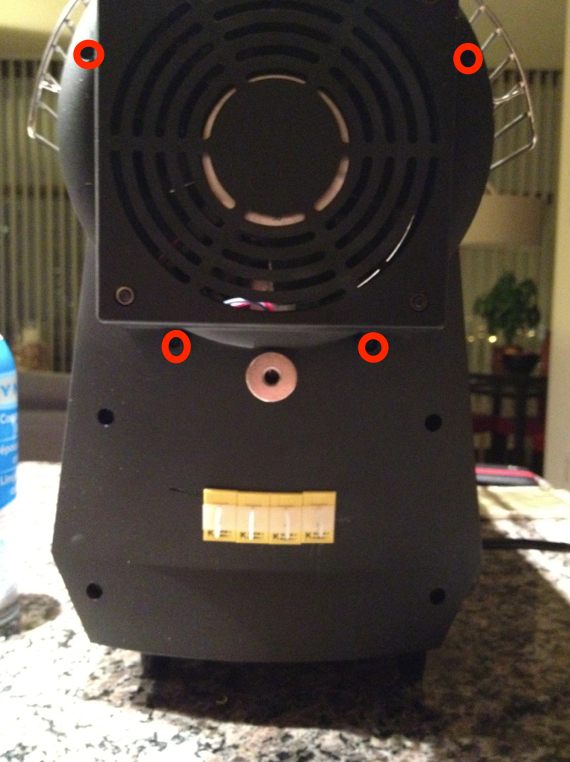
To start, we’ll remove the main fan assembly by removing screws 1 - 4, indicated in the image below. Once you’ve removed the screws, you can gently remove the fan assembly but be careful; the fan has a pair of short wires connecting it to the main circuit board. Once you have the fan assembly removed and can get to the wires, disconnect the white, plastic connector to free the fan. Don’t pull on the wires. Only pull on the white plastic parts.
Step 2: Cleaning
Once you’ve disconnected the fan wires, you can set the fan assembly to the side and with your brush and compressed air, clean any build-up on the rear cover where the fan assembly was. Be careful not to blow anything back into the roaster, but to brush it and blow it all out of the roaster. If you have a dust-buster with a small attachment, that might be handy as well.
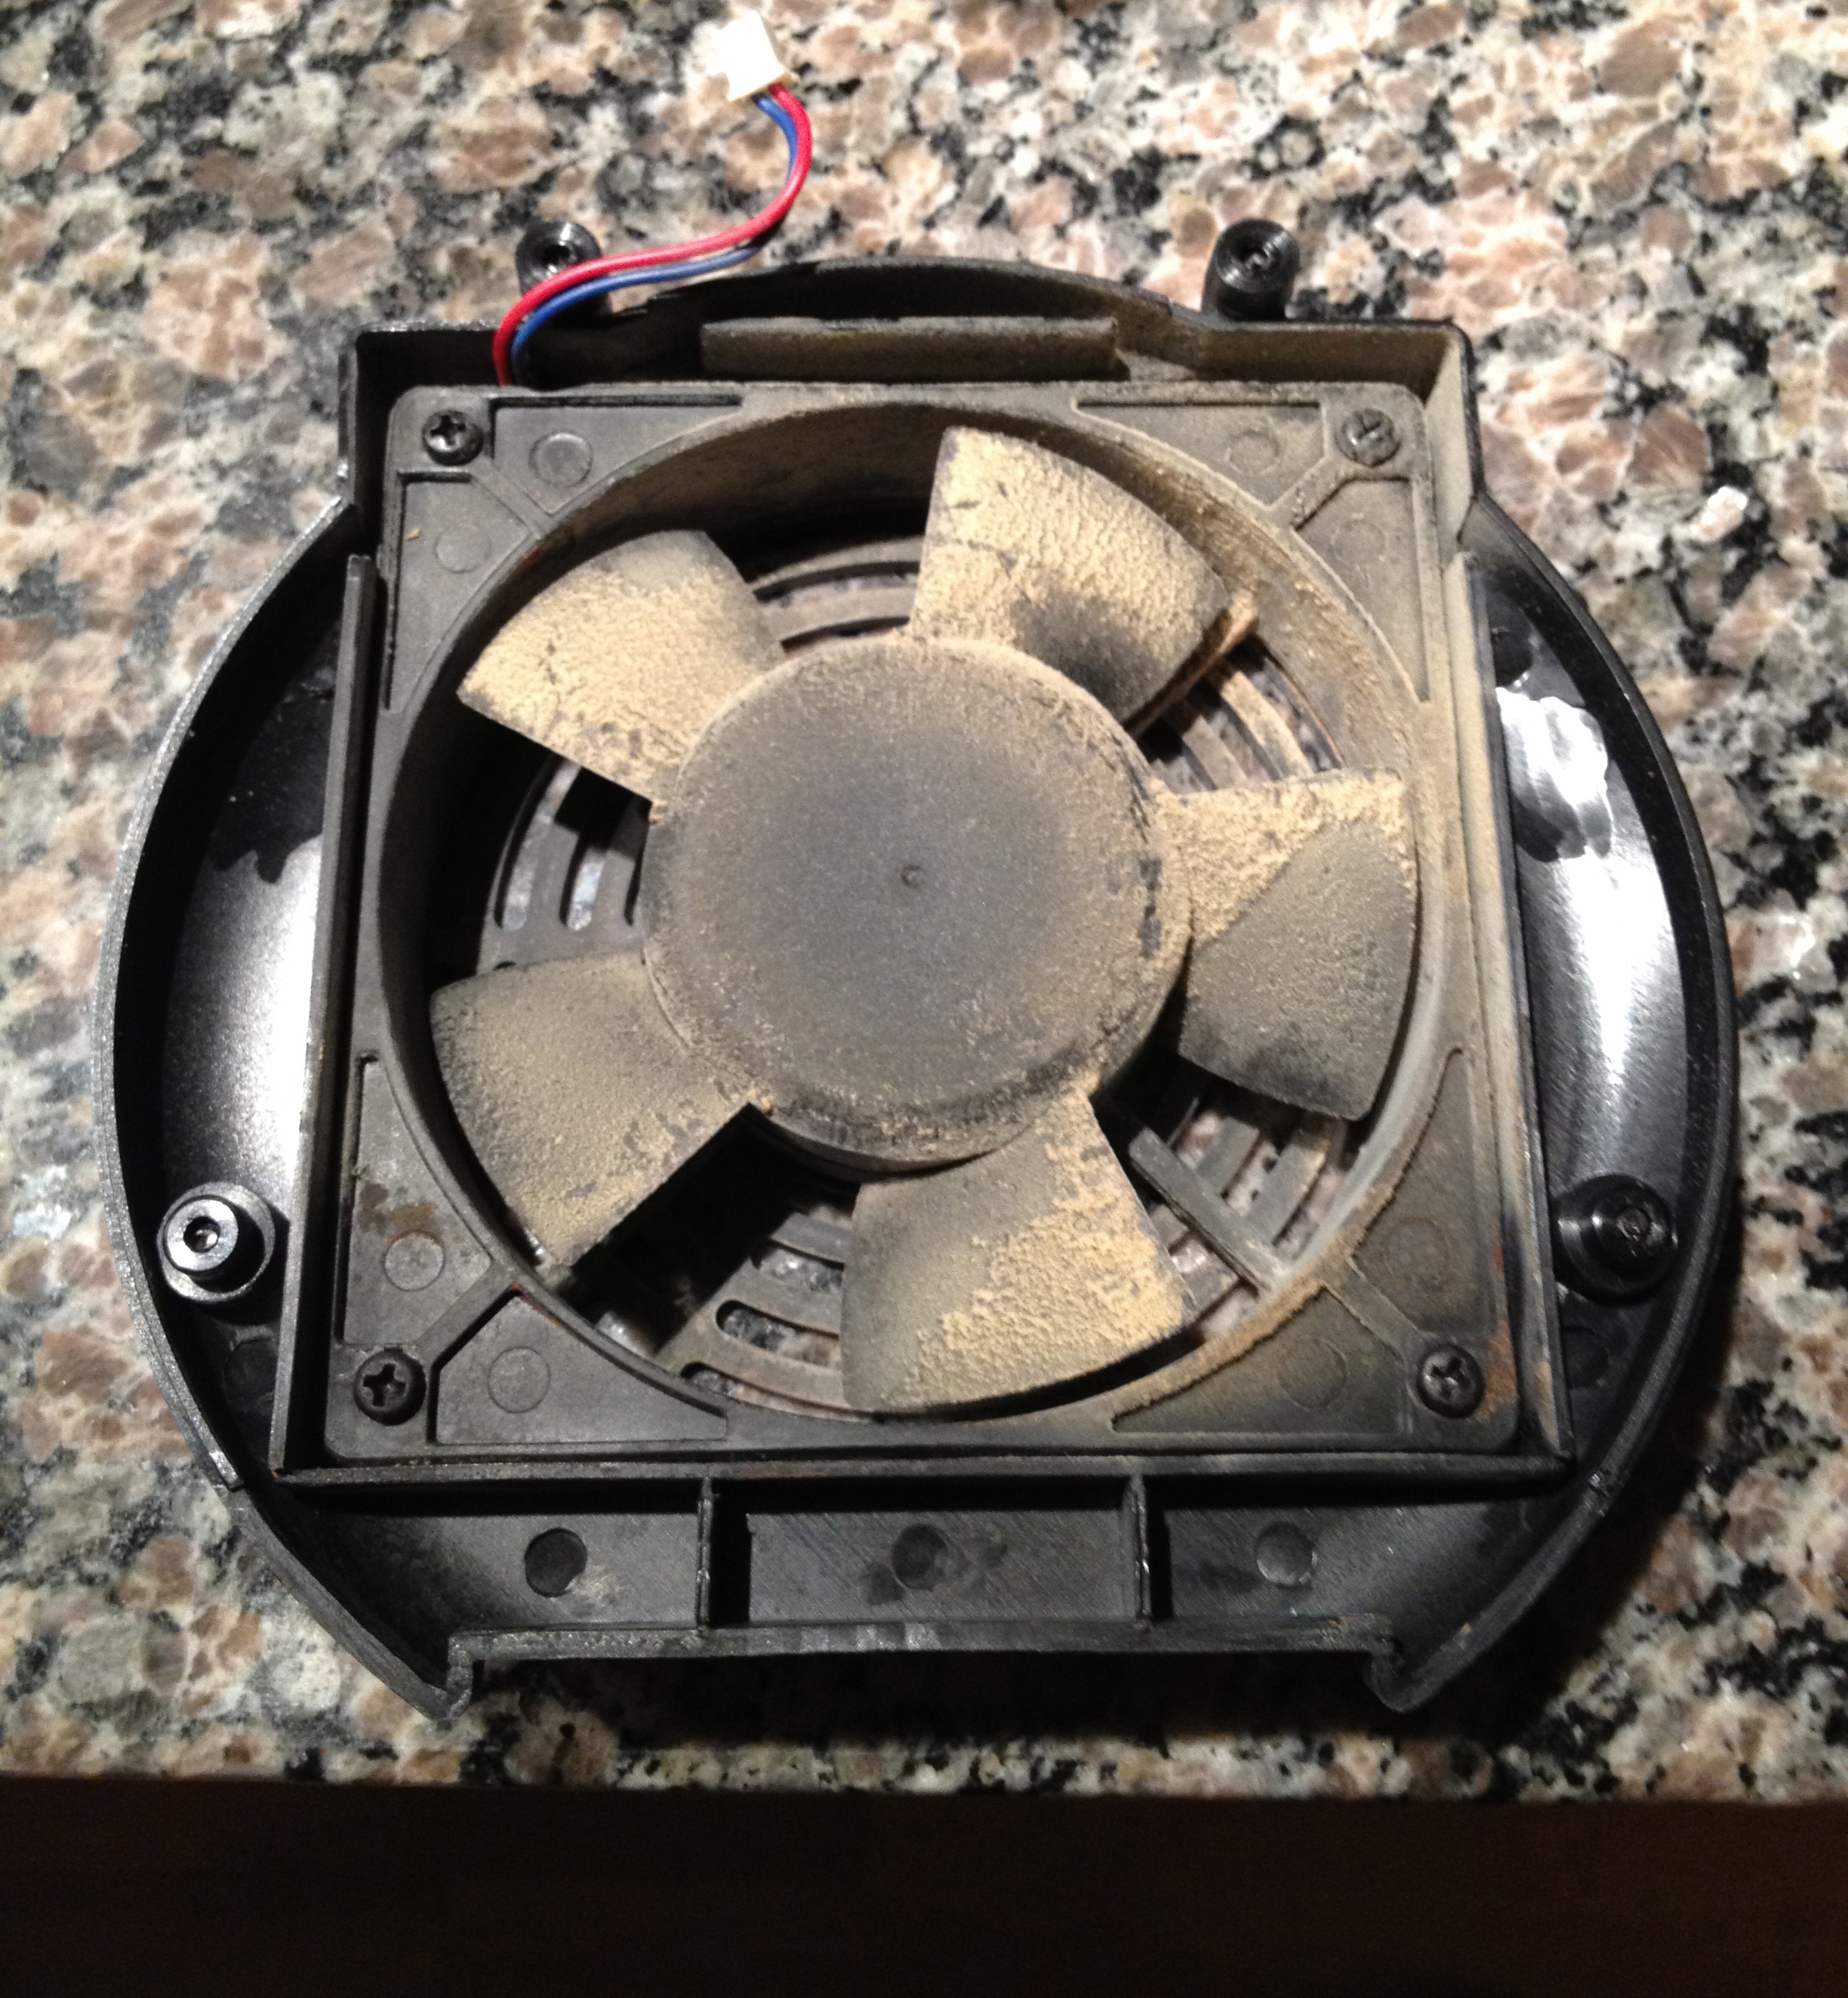
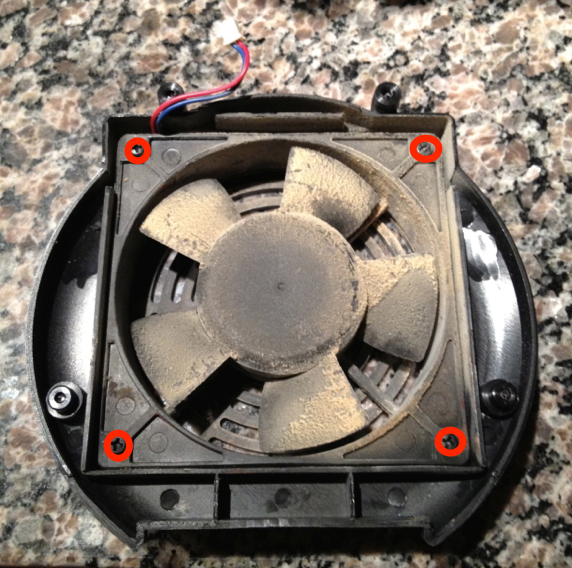
After you’ve cleaned the rear cover, you can remove the fan from the fan assembly by removing screws 5 - 8, illustrated in the picture below. Be careful of the nuts on the other side of these screws; they may fall out and escape to freedom.
Once you’ve removed the screws, the fan will slip right out of the assembly and you can now use your brush and compressed air to remove all the build-up from the fan blades, shroud, etc. Again, be careful if any of the nuts remained in the holes; they may be easy to lose. Be as thorough as possible because a little bit of build-up promotes additional build-up (the tar sticks nicely to itself). Also, pay attention to all the surfaces; the fan shroud has plenty of places for crud to collect and build up and the buildup can also be a fire hazard.
I put a little puro caff in hot water and use a scrub brush to clean the fan assembly after I’ve removed the fan. Just make sure it’s completely dry before replacing the fan. Obviously, don’t use the water on the fan itself, just the assembly.
Step 3: Re-assembly
Once you have everything spic-and-span, you can put it all back together in the reverse order:
- Attach the fan to the fan assembly with screws 5 - 8
- Attach the wires at the white plastic connectors
- Attach the entire fan assembly to the rear cover with screws 1 - 4
Step 4: Test
Because you disconnected the fan and monkeyed with everything, you’ll want to test it and make sure it all works again. If the fan doesn’t work, remove the fan assembly and double check that you fully-connected the wires.